
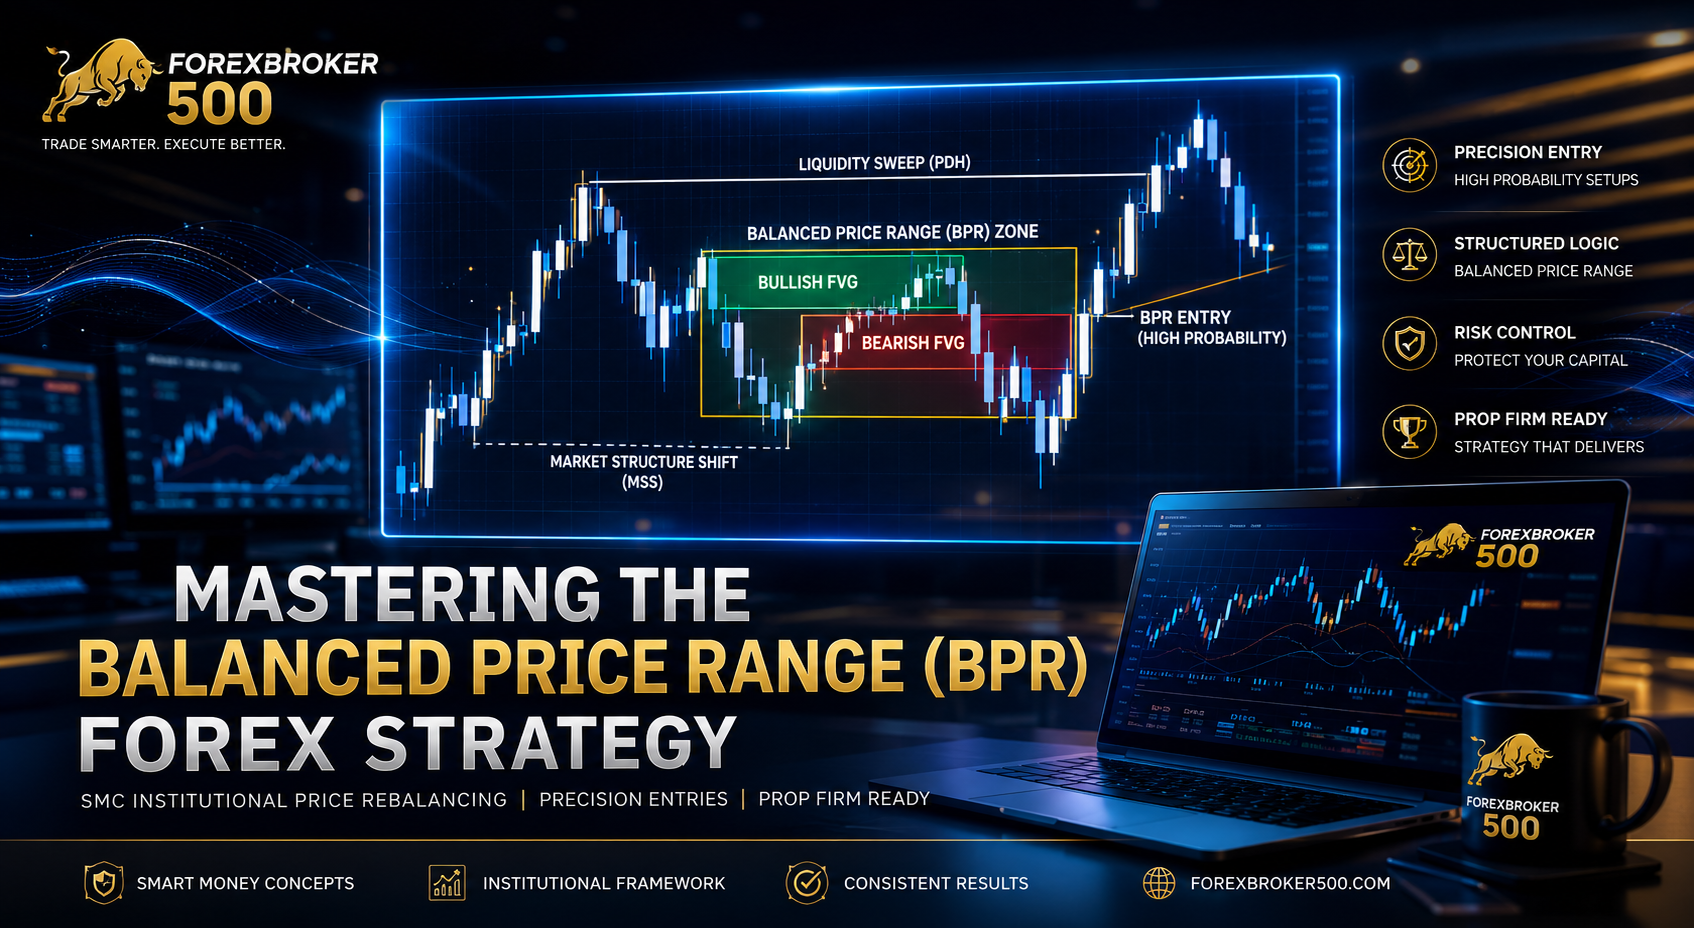
In Smart Money Concepts (SMC), single Fair Value Gaps (FVGs) represent price inefficiency. However, when market algorithms create two rapid displacements in opposing directions across the same price points, they leave behind an overlapping zone known as a Balanced Price Range (BPR).
For retail traders, these sharp back-and-forth spikes look like chaotic market noise. For funded prop traders reading interbank price delivery algorithms, a BPR signals that price has been completely rebalanced on both sides of the market—turning that specific zone into a high-probability entry array.
This guide breaks down what a Balanced Price Range is, how it differs from standard imbalances, and step-by-step execution rules for trading BPRs on forex and prop firm accounts.
What Is a Balanced Price Range (BPR)?
A Balanced Price Range (BPR) occurs when a bullish Fair Value Gap and a bearish Fair Value Gap directly overlap across the exact same price levels within a tight time window.

The Institutional Mechanics Behind a BPR
- Initial Imbalance: Price moves aggressively in one direction, leaving an unfilled liquidity gap.
- Immediate Reversal: Institutional players absorb liquidity and push price back through the initial gap in the opposite direction, creating a second opposing FVG.
- The Balance Point: Because buyers and sellers were both matched within that identical price band in short succession, the market considers this zone fully “balanced”. When price retraces to test this zone, it typically rejects sharply rather than filling deep into the imbalance.
BPR vs. Inversion Fair Value Gap (IFVG): What’s the Difference?
Traders frequently confuse a Balanced Price Range with an Inversion Fair Value Gap (IFVG). While both utilize broken or invalidated gaps, their structural setup is distinct:
| Feature | Balanced Price Range (BPR) | Inversion Fair Value Gap (IFVG) |
| Structure | Formed by two overlapping FVGs (one bullish, one bearish). | Formed when one single FVG is closed through and respected on the flip side. |
| Speed | Forms rapidly in a two-leg “whipsaw” displacement. | Can invert after price consolidates or returns much later. |
| Precision | Focuses specifically on the intersecting overlap region. | Utilizes the entire high-to-low range of the single inverted FVG. |
| Probability | High price sensitivity; often provides exact wick-entry touches. | High, but requires waiting for candle close confirmations. |
Key Takeaway: Every BPR contains an inverted imbalance element, but not every IFVG qualifies as a double-overlapping BPR. For setups comparing traditional order blocks to supply and demand, see our detailed guide on Order Blocks vs. Supply and Demand.
How to Identify a Valid Bullish and Bearish BPR
To avoid marking every random overlapping candle on your charts, apply strict structural filters.
1. Bullish Balanced Price Range (Buy Setup)
- Step 1: Locate a downtrend or liquidity sweep that generates a Bearish FVG.
- Step 2: Watch for an aggressive Market Structure Shift (MSS) upwards that creates a Bullish FVG directly inside or crossing over the Bearish FVG.
- Step 3: Highlight the exact zone where both FVGs overlap. This intersecting band is your Bullish BPR.
- Entry: Place a Buy Limit Order at the top edge of the BPR zone.
- Stop Loss: Below the lowest wick of the bullish displacement or the bottom of the BPR array.
2. Bearish Balanced Price Range (Sell Setup)
- Step 1: Locate a strong rally or buy-side liquidity sweep that creates a Bullish FVG.
- Step 2: Price immediately reverses downwards with heavy volume, creating a Bearish FVG that overlaps the previous Bullish FVG.
- Step 3: Mark the overlapping region. This is your Bearish BPR.
- Entry: Place a Sell Limit Order at the bottom edge of the BPR zone.
- Stop Loss: Above the high of the bearish displacement leg.
BPR Execution Framework for Prop Firm Traders
Trading a BPR in isolation can lead to low win rates if traded mid-range. To maximize accuracy on evaluation and funded accounts, combine BPRs with higher-timeframe (HTF) confluences.
Confluence Checklist:
- HTF Directional Bias: Confirm your trend alignment using proper Market Structure Mapping on the 4H or Daily timeframe.
- Liquidity Pool Sweep: Ensure the BPR formed immediately after an Anatomy of a Liquidity Hunt (e.g., sweeping the Asian Session Liquidity).
- PD Array Alignment: Look for BPRs forming inside Premium or Discount zones. A bullish BPR in a Discount zone carries significantly higher probability than one forming in Premium.
- Risk Parameters: Never risk more than 0.5% to 1% per trade to satisfy strict Prop Firm Risk Management Rules and avoid hitting daily drawdowns.

Accelerated Path to Getting Funded
Mastering price action arrays like the BPR is essential for institutional precision, but executing them under strict prop firm challenge rules requires a systematic execution blueprint.
Ready to Get Funded?
- Get Strategy Blueprint: If you want step-by-step rules to pass 100k evaluation challenges using institutional liquidity sweeps, download the complete FB500 Funding Edge Strategy.
- Apply for Capital: Looking to start your journey with top-tier backing? Visit our homepage to Apply for Funding and access our institutional trading resources today.
Summary Checklist
- A Balanced Price Range requires two opposite Fair Value Gaps intersecting over the same price points.
- BPRs reflect institutional price rebalancing, making them strong support and resistance zones on retracements.
- Always trade BPRs in the direction of the higher timeframe trend or immediately following an institutional liquidity sweep.
- Maintain disciplined risk management to avoid hitting the daily loss limits set by funding providers.

No responses yet